Windows 10 has a lot of benefits over previous editions of the OS, but battery life probably isn’t one of the main ones that you’d think about. However, Microsoft has done a lot of work with its battery-saving tech, making your laptop more efficient and last longer. The main setting, Battery Saver, is enabled by default, so you don’t have to do anything, but in this article I’ll show you how to change Windows’ battery options and how upgrading to Windows 10 affected battery life on our test laptops.
Battery saver
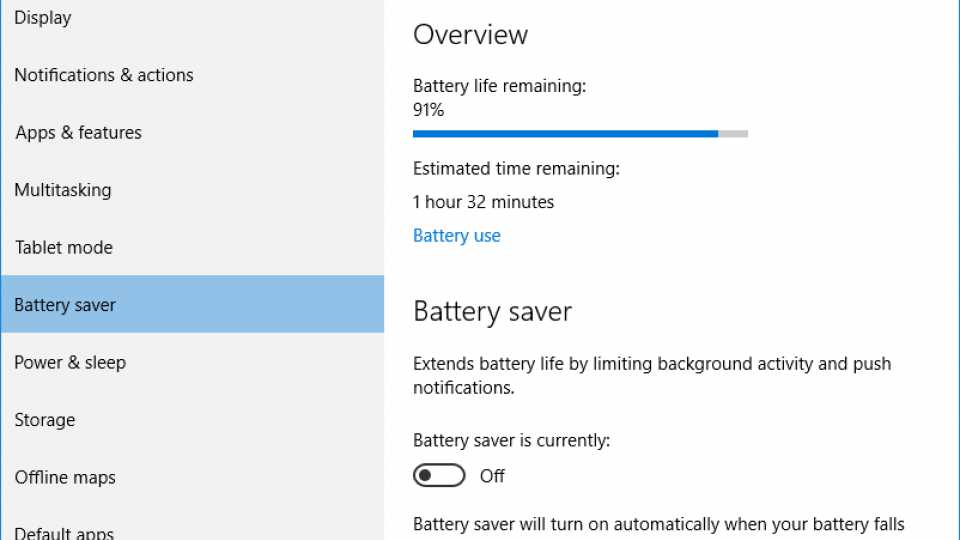
The first place to start is with Battery Saver, which is a new option in System settings. It’s designed to lower screen brightness, reduce background activity and stop push notifications when your battery hits a certain point (20% by default), reducing the load on the battery. While the defaults are good enough for most people, you can control the settings in more detail.
To access it click the Start Menu, type Battery Saver and choose the option. You’ll now be on the Battery Saver dialog box, which gives you an overview of your laptop’s battery life, including remaining percentage and estimated time remaining.
View our latest Dell discount codes
Battery use
You can click the Battery use link to take you to a screen that shows you what’s been eating your battery life up. From this screen, you can see how much time was devoted to the main laptop components: System (CPU, hard disk, apps and so on), Display and Wi-Fi. This is useful information, as you may want to turn down your display brightness by default if it’s using a lot of power. Next, you can see a list of applications and how much time they’ve been using. This is represented as the percentage of total application use, not the percentage of battery use.
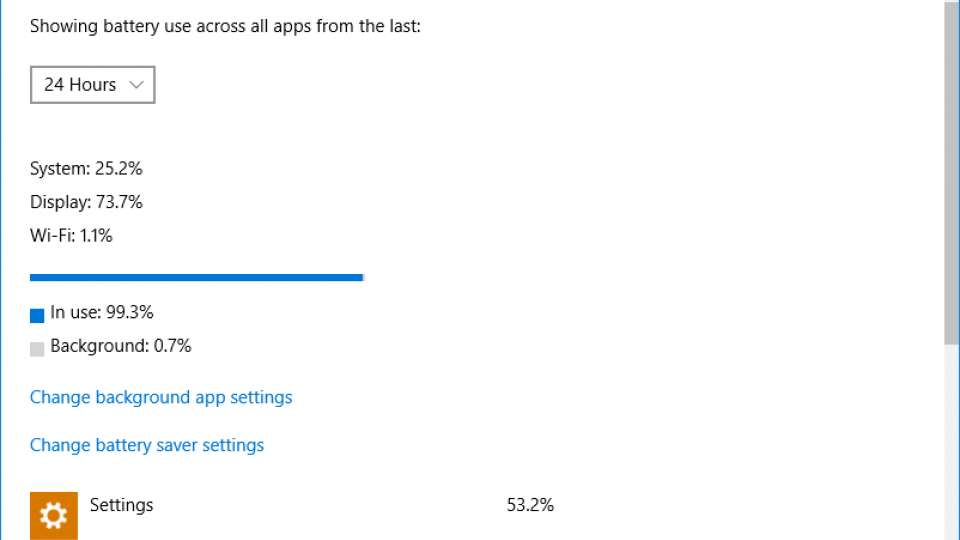
Click any app in this list and you can click Details to drill down and get more information, including how much System, Display and Wi-Fi time that app has been using. There’s also a block to tell you how much time the app has been using in use (actually in the foreground) and how much time it has been using in the Background working away. Depending on the app, you can use the sliders to control if it can run in the background and if it’s always allowed to run in the background, even when Battery Saver is enabled. Only full-screen Windows 10 apps (not standard Desktop applications) have these options, and even then, the options are limited to only some apps.
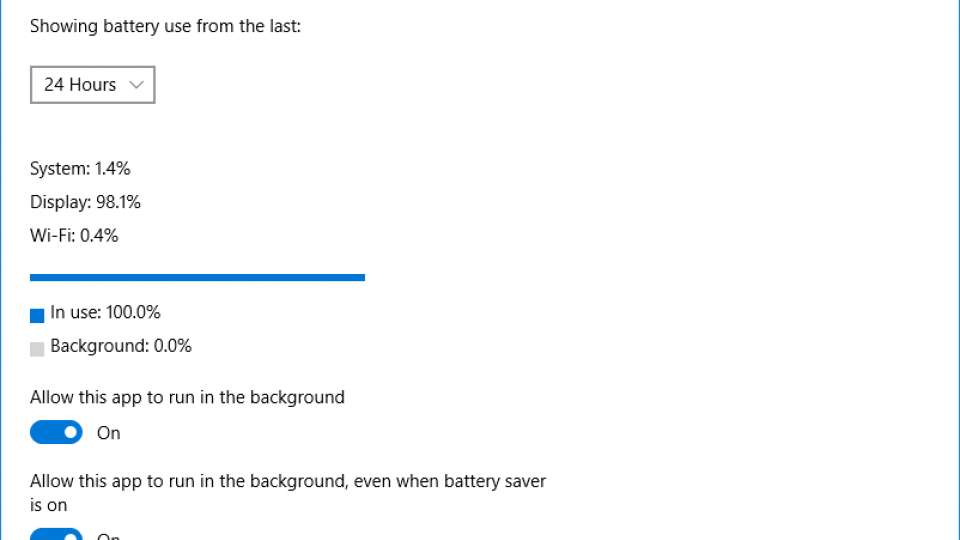
To more easily see which apps can run in the Background go back to the Battery Use dialog box and click the Change background apps settings. You can now view all of the apps that can run in the background and use the sliders next to their names to allow or disallow this feature.
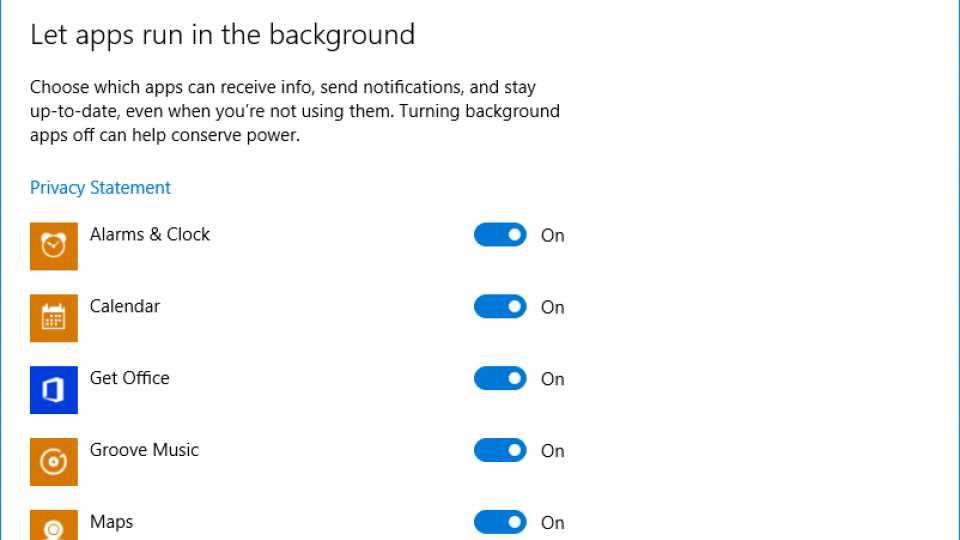
Battery saver settings
Back on the main Battery Saver screen, you can toggle the mode on and off, using the slider if you want to enable it manually, but unless you know that you’re going to spend a long time away from a power socket there’s little reason to do this. To make more advanced tweaks to the settings click the Battery saver settings link at the bottom of the page.
In this dialog box, you can choose to enable Battery saver automatically and choose the battery percentage when the feature is activated. The default setting of 20% should suit most laptops, but if your battery lasts a long time anyway, you may want to drop this to 15% or 10%; conversely, if your battery doesn’t last very long, you may want to increase the setting to 25% or 30%.
The default setting blocks apps from pushing notifications (eating processor and battery time), but you can override this setting using the ‘Allow push notifications’ tickbox, although I don’t recommend doing so. Your laptop’s screen is a massive drain on the power of your laptop, so lowering its brightness can help improve battery life. For that reason, it makes sense to tick the ‘Lower screen brightness’ option, so that you laptop will automatically dim the display when Battery Saver turns on.
Finally, if you’ve got an app that absolutely must run in the background and that you want notifications from at all times, you can use the ‘Always allowed’ section to allow this. Click the Add app button to see a list of apps that you can add to the section; only full-screen apps (not traditional Desktop applications) that support Battery Saver are listed: the Edge browser is an option, but Chrome is not, for example.
Power & sleep
Go back to the main Settings app and click on Power & Sleep to access the more traditional power-saving options. From this app, you can choose the time in minutes of inactivity for when your laptop should turn its screen off and when it should go to sleep. There are separate options for when it's plugged in and when it's on battery power. For most people, the default settings should be fine, but tweak them if you find that your computer’s powering down too frequently.
You can click Additional power settings to open up the old-fashioned Control Panel’s Power Options settings (one of the few times that Windows 10 hasn’t quite integrated old Windows into the new apps). These settings let you choose or create a power plan, which is a set of defined settings that set how your laptop works. Balanced is the default plan and you can click Change plan settings to see what it does. The basic settings are the same as in Power & Sleep, only you can also set a default screen brightness. There’s also an option called ‘Change advanced power settings’, which includes some really advanced settings, including controlling how the processor works. I advise sticking away from this section unless you really know what you’re doing and only mention it here out of completeness.
What does Windows 10 do for battery life?
To find out if the new Battery Saver mode can help boost battery life, we decided to test three old laptops before we upgraded them to Windows 10 and after we upgraded them. With two of our laptops, we were impressed to see that battery life had improved, not just by a little but by a full 80 minutes in the case of the Acer Aspire E111. The Dell Inspiron 17 managed a more modest 20-minute improvement while the Acer Aspire V5 actually lost 24 minutes of stamina. These results are in line with the anecdotal information we've seen, with some users complaining of significantly reduced battery life with Windows 10 while others reported no significant change. It’s worth running your own tests at home, perhaps playing a video and seeing how long your laptop lasts with and without Battery Saver mode enabled by default to see if your laptop improves or decreases with this mode enabled.


