Buying a DSLR is often seen as the route to taking better photos, but there are a lot of people out there that then struggle to understand the controls and end up using their camera on auto mode. In effect, the expensive camera becomes a posh compact, not quite producing the better results that they might expect. If you're stuck in this mode, Nikon could help with its Getting started with DSLR photography course.
One of the training sessions that Nikon runs at its centre of excellence in central London, this course is all about getting Nikon DSLR owners to understand the basic tenants of photography and how to use the manual modes on their camera. As the trainer, Mark Higgins, put it, " After today I don't want anyone to use green camera auto again ."
We popped along to one of the training sessions to find out what the course can offer.
Who's it for?
The course is open to anyone that signs up, but it's aimed at beginners to the DSLR world. One of the first things that Higgins did was to ask people to introduce themselves, explain how much photography experience they had and what issues they were having. The vast majority of people were on their first DSLR camera and had only used it in auto mode, but knew that they get could better shots out if they could use the manual modes. There were some people there who'd had a film SLR camera, but had fallen out of love with digital photography on compact cameras, and wanted to reignite their passion for it by going digital and learning how the manual modes worked. It was a great mix of friendly people (male and female, and big age range), all looking forward to learning more and finally unlocking the power of their DSLR.
Needless to say, this is a Nikon course, so you'll need to have a Nikon camera. Any DSLR will do, with the Nikon D3300 and D5300 (and previous models) popular choices, although we were there with our Nikon D610 and someone even had a D800 .
Getting started
With the introductions done, it was down to the nitty gritty of the course. To help explain points, the course uses a combination of slides to explain concepts, a Nikon DSLR plugged into a monitor to show how on-camera settings are used, and the opportunity to go out onto the streets of London to shoot real photos and put into practice what we'd be taught.
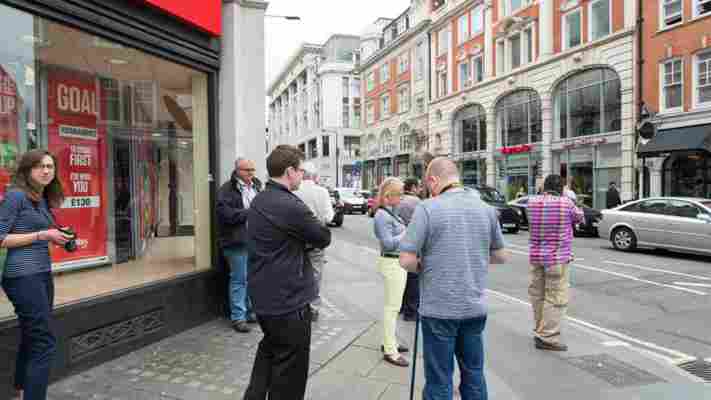
Using a live camera is a great idea. While there are variances between models, the menu system is roughtly similar on all models, making it easy to follow along. Our instructor was clear pointing out where settings might vary wildly, in which case he'd come round during a shoot and explain to each person how to make changes specifically for their camera. This is where going to a Nikon school makes a lot of sense, particularly for the beginner's course, as Higgins knows each Nikon DSLR inside-out, so can immediately demonstrate how to do something.
As this was a digital photography course, we started, not with the basics of photography, but file formats. It might seem a little strange, but the RAW mode on a camera is one of the most important ways of shooting. As Higgins explained, with RAW you can:
Rescue poor photos
Produce a better image with better colour
Undo any changes when you want
By showing everyone how to shoot in RAW and explaining how the Nikon View NX software, provided with every camera, works the class was set up for their shoot, producing images that they could later investigate and manipulate at their own leisure.
Photography 101
A lof of this course is about getting to grips with the three main settings on your digital camera, Aperture (how much light is let in), Shutter Speed (how quickly the picture is taken) and ISO (how sensitive to light the camera's sensor is). We won't go into the full details of that here, as that's really what the course is for, but Higgins was clear to explain how these three settings relate to each other.
Essentially, all photos have to be properly exposed. That's to say, they shouldn't be too dark or too light. Balancing Aperture, Shutter and ISO is how you get a photo exposed correctly. However, beyond exposure there's the artistic nature of each setting, where adjusting a setting creates a wildly different effect in the final image. It's this ability to tweak that creates better photos than using auto mode, where the camera picks the settings that it thinks are best.
Shutter speed
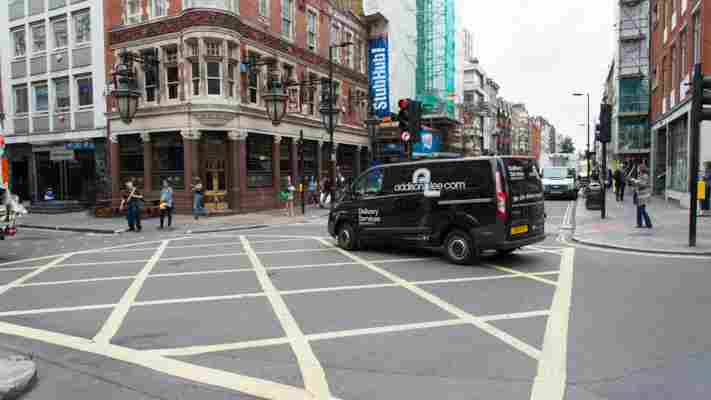
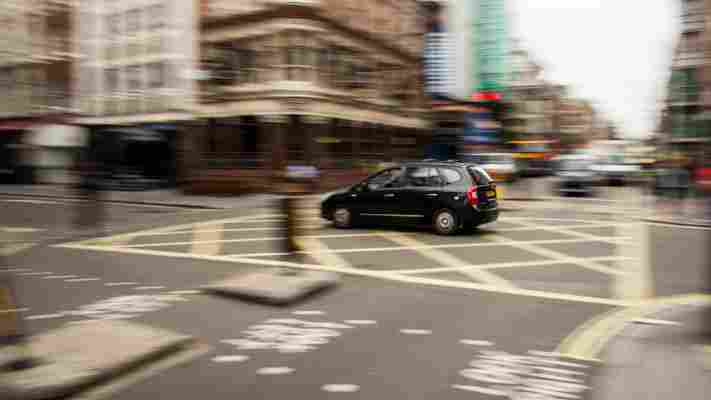
Our first lesson was with shutter speed, and how to use the camera on Shutter priority mode (the S on the dial). With this mode, you can choose how quickly the picture should be taken, with the camera filling in the other details to get the correct exposure. Sent onto the streets of London we were told to take some shots using a shutter speed of 1/200s (pretty fast) and some at 1/15s (quite slow). With the slower shutter speed we were also told to try tracking a moving object such as a car, panning at the same speed it was moving at.
It's a great place to start. Shooting a 1/200s you pretty much hit pause on the London traffic. Everything's sharp, but for all intents and purposes, you could have captured a scene where nothing was moving. This could be good for fast-paced sports, but this kind of shot doesn't add much interest to the image.
Shooting a 1/15s gives you a completely different perspective. We took the shot below at the same junction as above, but this time we panned with a moving car, blurring out the background. Perhaps we won't win any photography awards just yet, but with a slower shutter speed, the car now appears to be racing through London, creating more of a sense of urgency and the sense of action.
Aperture
Our next lesson was on Aperture. This is the setting on a camera that dictates how much light is let through the lens. Apertures are quoted as f/stop numbers, such as f/2.8 and f/11. Confusingly, the smaller the number, the larger the aperture and the more light that comes through; the larger the number, the smaller the apeture and the less light is let through. More importantly, the size of aperture is also used to dictate the depth of field. This dictates how much of the image is in focus: with a large aperture, you only get a small amount of the frame in focus, with everything else becoming blurred; a small aperture puts everything into focus. The former is good for portraits, drawing your attention to one part of the image; the latter for landscapes, where you want to be able to see everything.
It's a fairly complex thing to understand, but Higgins did a great job of it. The benefit of being on a course is that you're then sent back out into the streets of London to put everything into action. Depth of field effects work best with something close-up in focus, with the background trailing away. We shot these railings, starting at f/1.4 (top left), moving up to f/16 (bottom right). We used Aperture priority mode (the A on the dial) to choose how much light we wanted to let in, with the camera filling in the other details to create the corrrect exposure.
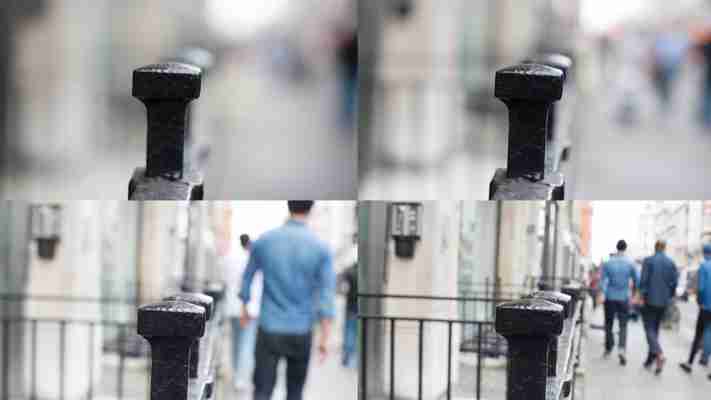
With the practical out of the way, being able to shoot images just after the demonstration was a great way to put theory into practice and understand how aperture works.
ISO
Our third lesson on the three important parts of photography was ISO. This is the setting that changes how sensitive to light the sensor is. Films had ISO ratings, but you were limited to this for the entire roll; with digital you can change things on the go. Making a camera more sensitive to light means a fast shutter speed can be used; making it less sensitive to light means a lower shutter speed has to be used. Adjusting ISO is, therefore, a way to adjust the sensor to suit the current lighting conditions.
The main goal of the initial demonstration was how you could take images in low-light without having to resort to flash, with the warning that high ISO sensitivities can increase noise (or grain, if you prefer) into shots. Still, it's a great demonstration of how the camera's third main exposure control can step in and let you get the shot you want. Our shot below's not particularly exciting, but it shows that increasing the ISO value can help you take shots in very dark rooms without resorting to flash.
Higgins was keen to point out that, although using the ISO control can help you shoot in any light, the most important thing was to start by looking at the quality of light. As he pointed out, " A DSLR is a tool for recording light; look at the recording light first ." If there's difficult or poor light, such as that streaming through a window behind a subject, move the subject if you can, the camera if you can't. Next, start by setting the ISO first, so that camera's as sensitive to light as it needs to be. Finally, work out what's most important and use that mode: if you need to capture fast-moving action, shutter priority is the key; if you need to control depth of field, such as for a landscape, aperture priority is your friend.
White balance
Next we learned about white balance. This is the setting on the camera that compensates for the colour of the light: incandescent light bulbs tend to have a yellow light that makes everything look warm; flourescent lighting tends to have a bluer light that makes everything look cold. While camera's have an automatic white balance it often doesn't get things right, so it often pays to go manual. The secondary aim is that by going manual, you can add a colour cast to an image to improve the photo. For example, going for a warmer tone may help bring a photo to life. White balance can be corrected in software if you shoot in RAW mode, but it's often best to get shots right the first time in camera. As you can see below, both shots were taken using the same settings, but with different white balance, giving a different feel and colour to both.
Manual mode
With the basics understood, the we were shown the camera's manual mode, which lets you control all of the above settings individually. Most of the time, we were told, you'll want to use Aperture or Shutter priority modes, letting the camera automatically balance the exposure, but there will be times when you want to force the camera to do entirely as you want. With the basic concepts of shutter, aperture and ISO explained, manual mode suddenly becomes a lot easier to understand.
Final shots
With the basic set of skills at our command, we were given a short overview of the rule of thirds , which is a composition technique, where you imagine the frame is split into a grid, with two horizontal lines (one a third down, one two-thirds down), and two vertical lines (one a third of the way across and one two-thirds of the way across). By lining up the lines with areas of interest, you create a more interesting framing. For example, landscapes often look better with the horizon placed on one of the horizontal lines. It's a rule, we were told, that you should know about, but that you should also feel free to break. The image below from Wikipedia (click to view the animated version), shows two images: the one on the left hasn't used the rule of the thirds, while the one on the right has.
Then we were sent back out onto the street to use everything we'd learned to capture an image of our choice. It was up to us to get a bit more creative. We chose to shoot this moped passing us in the street, using shutter priority and using the white balance to make the image a little bit warmer.
Conclusion
Our final session was spent reviewing each others photos, with the best shots winning a small prize. It was a friendly environment and by talking about each other's shots, you can see that the attendees had really taken the advice onboard. It was then just a matter of a short session talking about lenses and how to choose ones suitable for your camera. Given that this was a Nikon course, this section was well balanced and there's no hard sell or pressure to buy anything, just plain advice.
Talking to the other attendees, all of them were very happy with the day and all had grown in confidence, promising never to use the auto mode ever again. If we're being a little picky, we'd say that it would have been good to have some course materials with examples to take away, as a refresher. It's true that using your camera to look the settings you used to take your shots on the day is a brilliant record of how adjustments affect the final image, but a short 'cheat sheet' would have been nice.
Still, that's really a very minor complaint. An excellent trainer with brilliant Nikon camera knowledge, giving proper hands-on advice is what really makes this course. Seeing people go from being slightly afraid of the more complicated settings to vowing never to use the automatic modes again, shows how valuable this kind of instruction can be. If you've got a new Nikon DSLR and aren't sure how to get the most out of it, this is the best £129 that you'll spend.


