
Waterpik Water Flossers offer an efficient way to maintain oral hygiene, but to ensure they work effectively, proper charging is essential. Knowing the correct charging process helps to maximize the performance and lifespan of your device. This guide provides a simple, step-by-step breakdown of how to charge Waterpik Water Flosser. By following the instructions, you'll prevent potential charging issues and avoid prematurely wearing out the battery. Whether you are new to using a water flosser or need a refresher, this article will ensure your Waterpik Water Flosser stays in top condition, ready to deliver optimal performance every time.
Preparing Your Waterpik Water Flosser for Charging
Before you begin charging your Waterpik Water Flosser, make sure you have everything you need: the flosser itself, the charging base, and the charger. The device should be dry and clean to ensure it works properly. Select an appropriate charging area, preferably on a flat, stable surface near a power outlet. It's also important to read your model's manual, as different models may have slightly different instructions. Getting familiar with the details of your specific model will help prevent any confusion during the process. Ensure the charger and base are compatible with your device, and that there are no obstructions near the charging area.
Step-by-Step Guide: How to Charge Your Waterpik Water Flosser
Step 1 - Attach the Charging Base
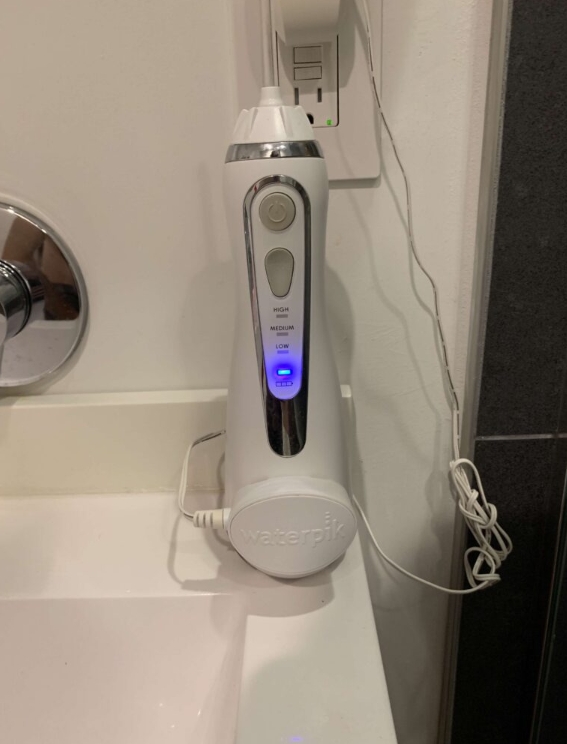
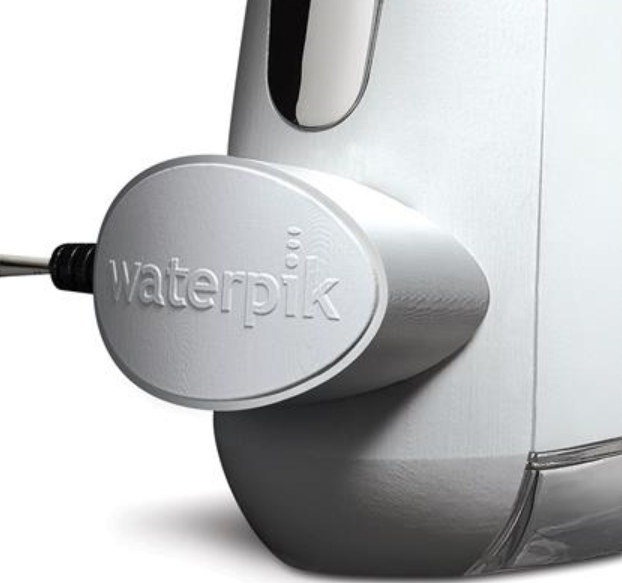
Place your Waterpik on its charging base, making sure it is seated properly. The charging base should be designed to align with the flosser, and there may be a click or slight resistance when the connection is secure. This alignment is crucial as it allows the charging process to begin properly. Double-check to ensure that the device is correctly placed on the base. If you find the device isn’t charging, it could be due to improper alignment. If the base is aligned properly and the flosser still isn’t charging, ensure no debris is blocking the charging contacts.
Step 2 - Plugging in the Charger
Once your Waterpik is placed securely on its base, plug the charger into a nearby power outlet. Make sure the plug is firmly connected to both the charging base and the wall outlet. A loose connection could result in the flosser not charging. For added protection, consider using a surge protector to shield your device from any electrical fluctuations that could damage the internal components. After plugging it in, you should see an indicator light, confirming that the charging process has begun. This light may blink or change colors, depending on your model, so refer to the user manual for specific indicator functions.
Step 3 - Charging the Device
Once plugged in, the Waterpik should begin charging. The indicator light on the device will typically show that charging is in progress. This light might blink or turn a solid color, which indicates the charging status—refer to your specific model’s manual for more details. Allow the Waterpik to charge undisturbed until it reaches full capacity, as indicated by the light. Depending on the model, charging can take several hours. Ensure the device remains on the charging base until it’s fully charged. Uninterrupted charging helps ensure the battery reaches its full potential and optimizes performance for longer use.
Step 4 - Unplugging and Storing the Device
Once the Waterpik is fully charged, unplug the charger from the wall outlet first, then carefully detach the device from the charging base. Leaving the Waterpik on the charger once fully charged can potentially lead to battery overuse, so it’s important to remove it from the base once charging is complete. Store the Waterpik in a dry, safe place, away from extreme temperatures, which could damage the battery. Keep the charger and base in an accessible location for future use. If you don’t plan on using it for a while, it’s best to store the Waterpik with a charged battery to ensure it’s ready when you need it next.
Troubleshooting Charging Issues
If your Waterpik isn’t charging, there are a few common things to check. First, ensure that all connections are secure. Confirm that both the charging base and charger are plugged in properly and the outlet is working. If the device still isn’t charging, inspect the charging contacts for debris or damage, as dirt or wear can affect charging efficiency. Try using a different outlet to rule out the possibility of a faulty power source. If these steps don’t resolve the issue, it may be time to contact Waterpik customer support for further assistance. In some cases, the charging base or charger might need replacement.
Maintaining Battery Life and Maximizing Charging Efficiency
Regular Charging Habits
To maximize the battery life of your Waterpik, avoid letting the device drain completely before recharging it. Instead, try to top off the battery regularly, as this helps maintain the battery’s overall health. Refrain from charging the device for excessively long periods after it’s fully charged, as overcharging can damage the battery. Adhering to the user manual’s guidelines on optimal charging cycles will help you get the most out of your device’s battery. In addition, cleaning the charging contacts regularly can prevent build-up and improve charging efficiency.
Storing the Waterpik Water Flosser
When not in use, store your Waterpik in a dry and cool environment, away from direct sunlight and extreme temperatures. Excessive heat or cold can have a negative impact on the battery’s life. Additionally, it’s important to ensure that the device is fully charged before storing it for long periods, as leaving it partially charged can reduce its battery lifespan. Proper storage and regular use will help maintain the longevity of your device, ensuring it’s always ready for your next use.
Conclusion
Proper charging of your Waterpik Water Flosser is essential to keeping it functioning at its best. By following the steps outlined in this guide on how to charge Waterpik Water Flosser, you can ensure that your device is always ready for use and performing optimally. Regular charging, along with proper maintenance and good storage practices, will not only extend the life of your flosser but also improve your overall oral hygiene routine. Troubleshooting minor charging issues is simple, and with consistent care, your Waterpik will continue to deliver excellent results for years to come.
FAQ
How long does it take to fully charge a Waterpik Water Flosser?
It typically takes about 4 hours to fully charge a Waterpik Water Flosser. Always refer to your specific model’s manual, as charging times may vary slightly.
Can I use my Waterpik Water Flosser while it’s charging?
No, it’s not recommended to use your Waterpik Water Flosser while charging. Wait until the device is fully charged for optimal use and safety.
What should I do if my Waterpik Water Flosser isn’t charging?
Check all connections and ensure they are secure. Inspect the charging contacts for debris or damage. Try a different outlet. If problems persist, contact Waterpik customer support for further assistance.


